
Disclaimer
If your pump is going to be connected to a mains water supply using a rain-to-mains valve, you must hire a licensed and registered plumber to do the job. Mains water connections are regulated, so it's illegal to connect to it without the proper qualifications.
Even if hiring a professional, this guide is a great resource to help you understand what a correct installation looks like to ensure everything is done correctly and avoid future problems that could damage your pump or water tank.
Manufacturer Guidance:
Each pump manufacturer will have specific guidance or installation requirements that must be followed to qualify for the pump's warranty. While we can supply general tips for installation, always refer to the instructions provided with your pump or contact the manufacturer directly for information specific to your pump model,
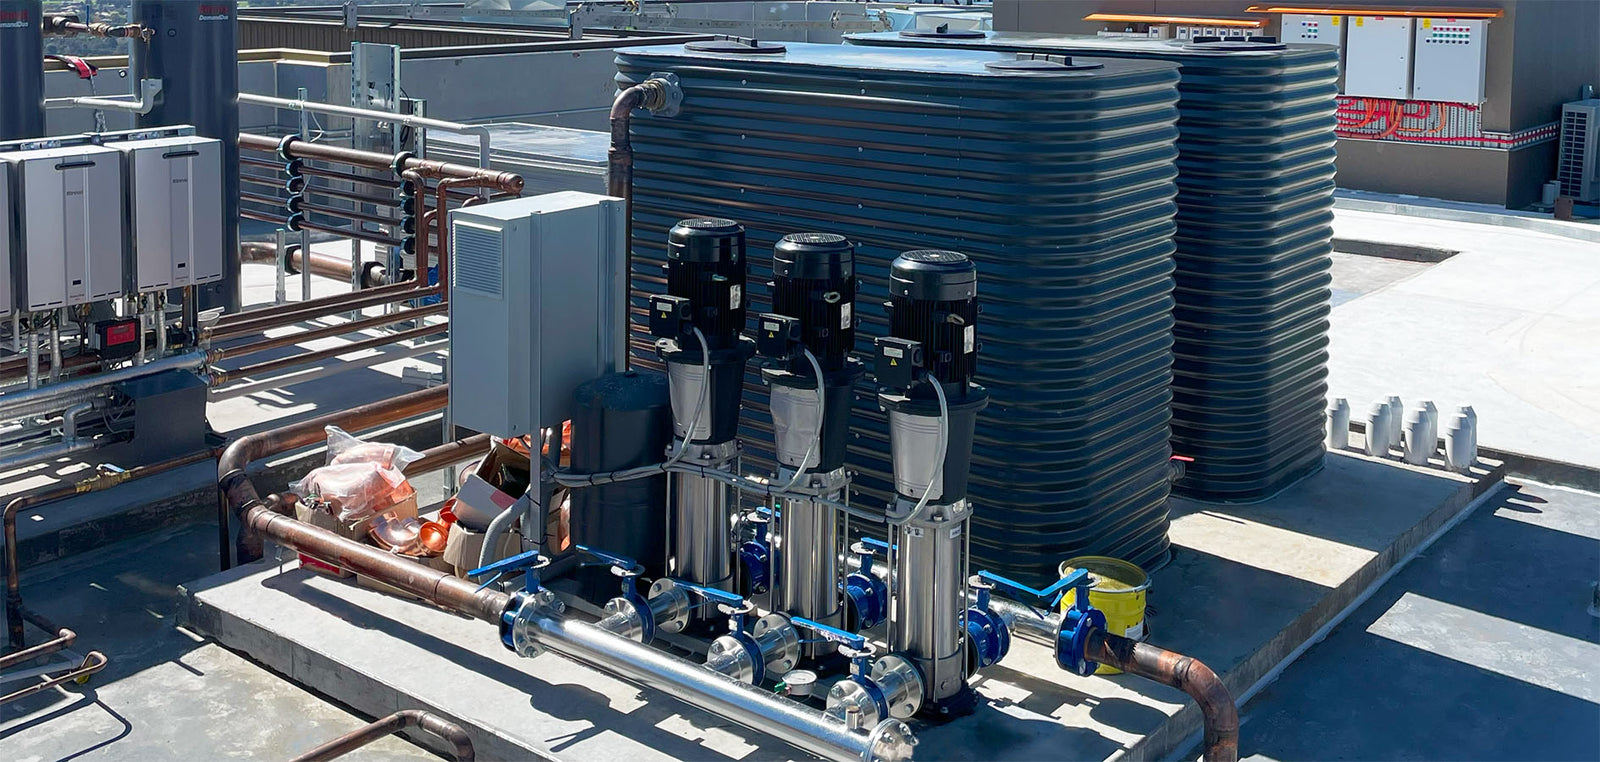
Installing an External Pump
External pumps are the most common for household water supply, irrigation, and increasing water pressure. Getting the installation right will help your pump run smoothly and last longer.
1. Where to Put Your Pump
- You should always install your pump as close to your water tank as possible. Many external pumps will only have a limited range they can suction the water to be pumped further. Additionally, the greater the length of the pipework between the water tank and the pump, the worse performance the pump will be able to provide.
- Install the pump on a solid, level surface like a concrete slab or pavers to stop it from moving or vibrating.
- Try to keep it away from bedrooms or neighbours' homes, as pumps make noise.
2. Use a Pump Cover
- The NSW government requires that pumps be housed in a soundproof enclosure to reduce noise.
- A pump cover will also protect the pump from the weather and help it last longer.
- Make sure the cover has good ventilation so the pump doesn't overheat.
3. Use a Flexible Hose
- Always use a flexible hose to connect your tank to your pump. A flexible hose helps to prevent rigid pipes from shaking loose over time due to vibrations from the pump.
4. Install a Y-Strainer or Pre-Filter
- A Y-strainer is a filter installed before your pump's inlet. They are essential to stop dirt and debris from getting into your pump and causing damage.
- Most manufacturers will not cover warranty claims if you don't have one installed.
- Clean the strainer regularly to keep your pump running properly.
5. Choose the Right Pipe Size
- The pipe running from your tank to your pump should be at least 25mm in diameter, but a larger pipe may be required for high-flow pumps.
- The outlet pipe should be the same size as the pump's outlet or no more than one size smaller.
- Avoid sharp bends in the pipes—every bend reduces water flow and pressure.
6. Install a Check Valve
- A check valve, non-return valve, reflux valve, retention valve, foot valve, or one-way valve stops water from flowing backwards into the pump.
- If your pump is installed above the tank water level or a larger distance from your tank, you should also install a foot valve inside the tank to help the pump maintain suction.
7. Electrical Safety
- Never use an extension cord to power your pump.
- The pump must be plugged into a power outlet that has an RCD safety switch.
8. Prime the Pump Before Use
- Fill the pump with water before turning it on to avoid damaging the seals.
- Check for air leaks in the suction line if the pump keeps losing its prime.
9. Consider Adding a Pressure Tank
- A pressure tank is a small storage tank that sits on top of the pump.
- It helps reduce how often the pump turns on and off, preventing premature wear and tear and reducing the time the pump spends active.
- A pressure tank can solve many common pump problems, such as inconsistent water pressure and frequent cycling.
Installing a Submersible Pump
Submersible pumps sit inside the water tank and are great for quiet operation and high efficiency. However, if they're installed incorrectly, they can cause serious problems.
1. Keep Metal Swarf Out of the Tank
- If you need to drill a hole in your steel water tank, do not let metal shavings (swarf) fall inside the tank. Metal shavings will void your tank's warranty as they act as a point of corrosion. They could also clog your pump, leading to early failure.
- Even in a fibreglass or poly water tank, you should avoid any debris from the pump installation falling into and remaining in your tank to prevent potential issues.
2. Seal the Outlet Pipe Properly
- Don't just run the pipe out of the top of the tank—this leaves an air gap that allows mosquitoes to enter and breed in your water. It is a requirement under NSW legislation that your tank be mosquito-proof.
- Instead, use a bulkhead fitting to properly seal around the pipe and prevent leaks.
Example of a poor pipework installation:

3. Route the Power Cable Correctly
- Do not run the power lead through the inlet strainer. This weakens the strainer and allows debris into your tank.
- Instead, use a dedicated waterproof entry point for the power cable.
4. Position the Pump Correctly
- The pump should sit slightly above the bottom of the tank to avoid sucking up sediment.
- If your pump has a float switch, ensure it has room to move freely.
5. Use a Check Valve on the Outlet Pipe
- A check valve will help maintain pressure and prevent water from flowing back into the pump.
6. Electrical Safety
- Submersible pumps must be connected to a power outlet with an RCD safety switch.
- If the pump needs to be hardwired, hire a licensed electrician.
It might seem overwhelming, but following some simple steps will help your pump run smoothly, last longer, and provide a reliable water supply for years to come. If unsure, consult a professional to ensure everything is done right.